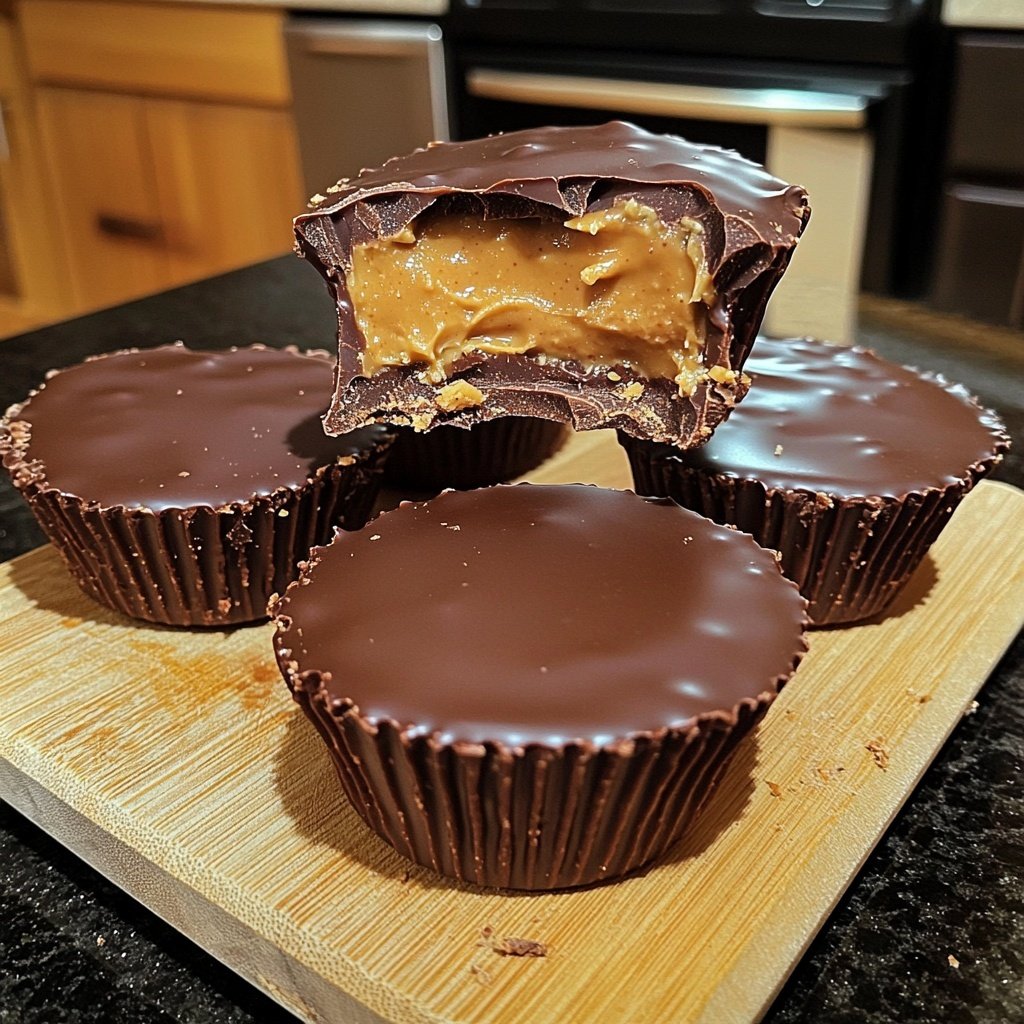
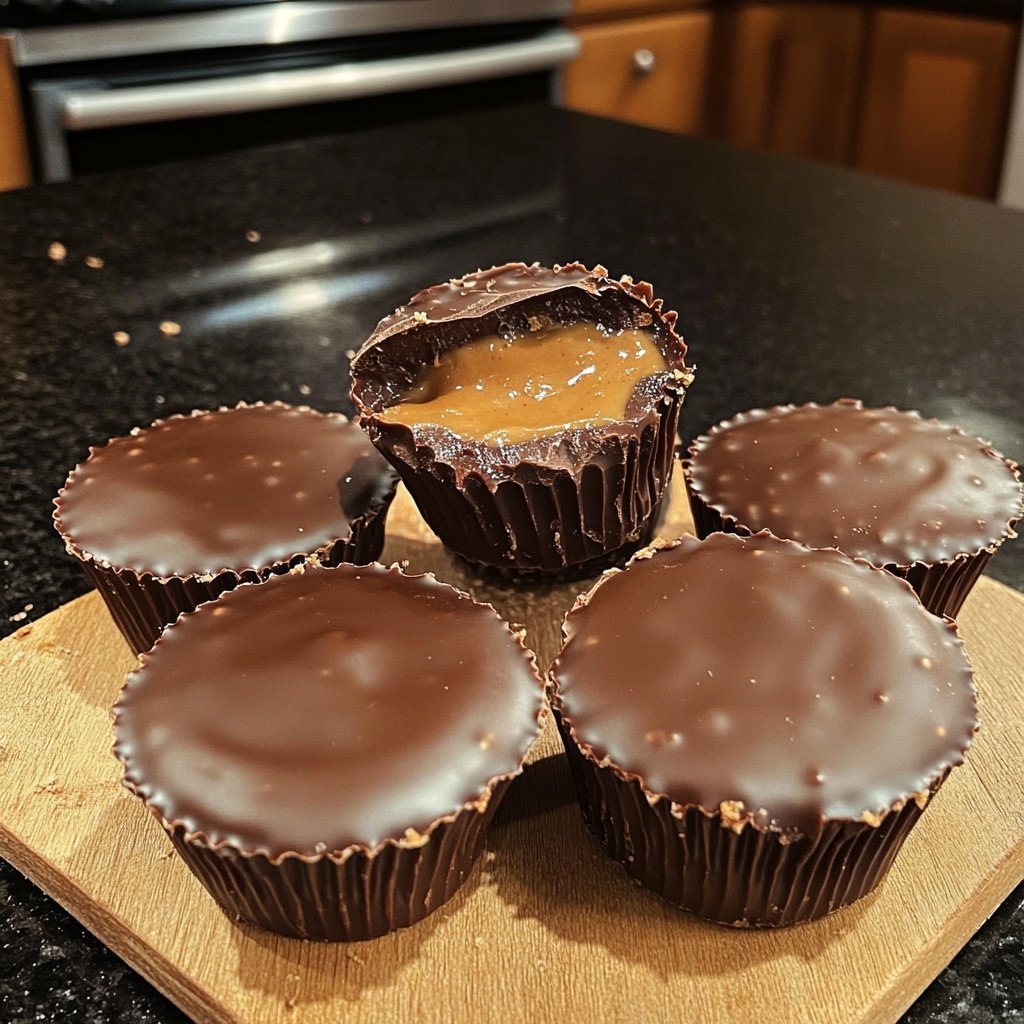
Homemade Reese’s Cups with Chocolate
Highlighted under: Sugar & Spice
Enjoy the rich, creamy delight of homemade Reese’s Cups, a perfect treat for chocolate lovers!
Creating your own Reese’s Cups at home is a fun and rewarding experience. You'll appreciate the fresh ingredients and the ability to customize them to your taste!
Why You Will Love This Recipe
- Rich chocolate flavor paired with creamy peanut butter
- Customizable sweetness to suit your preference
- Perfect for sharing or as a personal treat
The Joy of Making Your Own Treats
There's something incredibly satisfying about making your own treats at home. Not only do you get to control the ingredients, but you also have the freedom to customize flavors and textures to suit your taste. Homemade Reese’s Cups allow you to indulge in a classic favorite while tailoring it to your preferences. It's a fun activity that can be enjoyed alone or shared with friends and family, making it a perfect weekend project or a delightful surprise for loved ones.
Crafting your own candy not only brings joy but also reignites the nostalgia of childhood. Remember the excitement of unwrapping a Reese’s Cup? Now, you can recreate that joy in your own kitchen, filling your home with the heavenly aroma of melting chocolate and peanut butter. Plus, these homemade treats make wonderful gifts. Imagine gifting a box of your homemade Reese’s Cups – they are sure to impress anyone with a sweet tooth!
Customizable Ingredients for a Personal Touch
One of the greatest benefits of making your own Reese’s Cups is the ability to customize the ingredients. If you prefer a darker chocolate, opt for bittersweet or dark chocolate chips. For those who enjoy a hint of sea salt, sprinkle some on top before the chocolate sets. Additionally, you can adjust the sweetness of the peanut butter filling by varying the amount of powdered sugar. This way, you can create a version that aligns perfectly with your taste preferences.
For a healthier twist, consider using natural peanut butter, which often contains just peanuts and salt. This option not only enhances the flavor but also adds nutritional benefits. If you're vegan, swap out the chocolate chips for dairy-free alternatives and use maple syrup instead of powdered sugar for the filling. The possibilities are endless, allowing you to experiment and find your perfect combination!
Storing and Serving Suggestions
Once your homemade Reese’s Cups are cooled and set, proper storage is key to maintaining their deliciousness. Keep them in an airtight container in the refrigerator, where they can last for up to two weeks. If you want to enjoy them longer, consider freezing them. Just ensure they are well-wrapped to prevent freezer burn, and you can savor your homemade treats for up to three months!
When it comes to serving, these cups can be enjoyed straight from the fridge for a refreshing treat or allowed to sit at room temperature for a few minutes for a softer bite. They make an excellent addition to dessert platters, birthday parties, or movie nights. Pair them with a glass of cold milk or a scoop of vanilla ice cream for an indulgent dessert experience that everyone will love!
Ingredients
Ingredients
For the Chocolate Layer
- 1 cup semisweet chocolate chips
- 1 tablespoon coconut oil
For the Peanut Butter Filling
- 1 cup creamy peanut butter
- 1/2 cup powdered sugar
- 1/2 teaspoon vanilla extract
Make sure to adjust the sweetness of the peanut butter filling according to your taste!
Instructions
Instructions
Melt the Chocolate
In a microwave-safe bowl, combine the chocolate chips and coconut oil. Microwave in 30-second intervals, stirring in between, until completely melted and smooth.
Prepare the Molds
Line a muffin tin with cupcake liners. Spoon a small amount of melted chocolate into the bottom of each liner, covering it evenly.
Make the Peanut Butter Filling
In a mixing bowl, combine the peanut butter, powdered sugar, and vanilla extract. Mix until smooth and well combined.
Assemble the Cups
Once the chocolate layer has set slightly, add a spoonful of the peanut butter mixture on top of the chocolate in each liner. Top with more melted chocolate to cover the filling completely.
Chill and Serve
Refrigerate the cups for about 15 minutes or until the chocolate is firm. Enjoy your homemade Reese’s Cups!
Store any leftovers in an airtight container in the refrigerator.
Pro Tips
- For added flavor, try mixing in a pinch of sea salt into the peanut butter filling.
Nutritional Benefits of Peanut Butter
Peanut butter is not just delicious; it also packs a nutritional punch. Rich in protein, healthy fats, and essential vitamins, it provides a satisfying energy boost. Incorporating peanut butter into your treats not only enhances flavor but also increases the nutritional value. It is a great source of vitamin E, magnesium, and potassium, which can contribute to overall health when consumed in moderation.
However, it's essential to choose the right type of peanut butter. Natural varieties with minimal ingredients are often the healthiest option. This ensures that you're enjoying the purest form of this nutty delight, free from unnecessary additives or sugars. So, when whipping up your homemade Reese’s Cups, opt for high-quality peanut butter for the best flavor and health benefits.
Tips for Perfect Chocolate Coating
Achieving the perfect chocolate coating is crucial for creating that signature Reese’s Cup experience. When melting chocolate, be patient and use a microwave in short bursts, stirring frequently to prevent overheating. Overheating can cause the chocolate to seize, ruining its smooth texture. If you're using a double boiler, make sure the water doesn't touch the bottom of the bowl – it's all about gentle heat!
Additionally, ensure that your molds are completely dry before pouring in the chocolate. Any moisture can affect the consistency and cause the chocolate to not set properly. Once your cups are assembled, allow them to cool in the refrigerator to achieve that firm, satisfying bite. Following these tips will guarantee a delightful homemade treat that rivals the store-bought versions!
Questions About Recipes
→ Can I use dark chocolate instead?
Yes, dark chocolate can be used for a richer flavor.
→ How long do these cups last?
Homemade Reese’s Cups can last up to two weeks in the refrigerator.
→ Can I make these vegan?
Yes, use dairy-free chocolate and a vegan peanut butter option.
→ What can I substitute for powdered sugar?
You can use granulated sugar or make your own powdered sugar by blending granulated sugar in a blender.
Homemade Reese’s Cups with Chocolate
What You'll Need
For the Chocolate Layer
- 1 cup semisweet chocolate chips
- 1 tablespoon coconut oil
For the Peanut Butter Filling
- 1 cup creamy peanut butter
- 1/2 cup powdered sugar
- 1/2 teaspoon vanilla extract
How-To Steps
In a microwave-safe bowl, combine the chocolate chips and coconut oil. Microwave in 30-second intervals, stirring in between, until completely melted and smooth.
Line a muffin tin with cupcake liners. Spoon a small amount of melted chocolate into the bottom of each liner, covering it evenly.
In a mixing bowl, combine the peanut butter, powdered sugar, and vanilla extract. Mix until smooth and well combined.
Once the chocolate layer has set slightly, add a spoonful of the peanut butter mixture on top of the chocolate in each liner. Top with more melted chocolate to cover the filling completely.
Refrigerate the cups for about 15 minutes or until the chocolate is firm. Enjoy your homemade Reese’s Cups!
Extra Tips
- For added flavor, try mixing in a pinch of sea salt into the peanut butter filling.
Nutritional Breakdown (Per Serving)
- Calories: 380 kcal
- Total Fat: 26g
- Saturated Fat: 15g
- Cholesterol: 0mg
- Sodium: 85mg
- Total Carbohydrates: 32g
- Dietary Fiber: 3g
- Sugars: 24g
- Protein: 6g